In our last post we introduced our Raspberry Pi proof-of-concept project and outlined the physical components and setup required for using the Raspberry Pi as an industrial touch screen PC in a harsh environment. Please see our previous post for important information to consider before integrating a Raspberry Pi with our industrial touch screens.
Update Jan. 2018 – Because this post was written a number of years ago, some information is outdated. For updated instructions on calibrating a Hope Industrial touch screen with Raspberry Pi, visit this blog post.
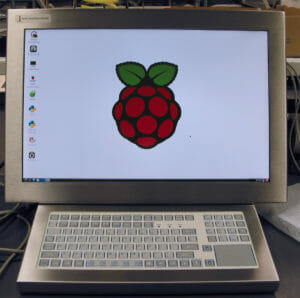
In this post, we will show how easy it is to set up the Raspbian Operating System to work with a Hope Industrial touch screen without adding any third-party drivers. This how-to assumes a basic understanding of Linux command line use and text file editing. Feel free to contact us with any questions.
Installing the Raspbian OS
Linux installers are very advanced and easy to use these days, and Raspbian is no exception. The cheekily named NOOBS (New Out of Box Software) installer makes things very simple. You can find the software and a link to the quick-start guide here.
First, download the SD card image on your PC, then decompress it to a properly prepared SD card (4 GB or larger), insert it in the Raspberry Pi, and choose which distribution you want to run. When asked, choose Raspbian, which is the Raspberry Pi-optimized version of the Debian Linux distribution.
Once up and running, make sure your Raspberry Pi has an Internet connection.
Calibrating the Touch Screen – Inverting the Y-Coordinate
As mentioned in the first post, Raspbian has default drivers that recognize our industrial touch screen as an HID pointing device, which means if you press the screen after simply making the USB connection, you will get a response. However, at this point, the Y-coordinate is reversed, which means that touches to the top of the screen show up on the bottom, and vice versa. Our first step is to correct this problem.
To do this, we will need to make some changes to the evdev component, which is a part of the Linux kernal that handles input devices.
1. Open the evdev configuration file in your favorite text editor. We use vi:
/usr/share/X11/xorg.conf.d/10-evdev.conf
2. Note how this file is laid out. It has sections for various types of input devices, along with “match” types that designate which devices a section applies to, and attributes and settings for those devices.
3. Following the format in the file, create a new “InputClass” section with the following attributes:
- Identifier “elo touchscreen catchall” – This is just the name we will give the section.
- MatchVendor “EloTouchSystems_Inc” – Tell the section to match all devices with this vendor. All Hope Industrial Touch Screens use touch controllers made by Elo Touch Systems. Of course, if you have multiple touch screens connected and need separate calibrations for each, you will want to match on something else. The evdev documentation can help here.
- MatchDevicePath “/dev/input/event*” – Keep this default setting.
- Driver “evdev” – Keep this default setting.
- Option “InvertY” “true” – Tell the driver to invert the Y axis.
The final text of this new section should look like this:
Section "InputClass"
	Identifier "elo touchscreen catchall"
	MatchVendor "EloTouchSystems_Inc"
	MatchDevicePath "/dev/input/event*"
	Driver "evdev"
	Option "InvertY" "true"
EndSection
After saving this file and rebooting, the cursor should follow your finger much more closely, but will not yet be perfectly calibrated. We will address this in the next section.
Calibrating the Touch Screen – Aligning the Pointer
The touch screen alignment requires us to set some parameters that tell the driver how to “stretch” the touch screen input across the available screen area. To do this, we have to download a simple utility called evtest. You can use the Debian Advanced Package Tool (Apt) tool to download the utility. Learn more about Evtest here.
1. Use apt installer to download and install the “evtest” package.
2. Run evtest.
3. Evtest will list the attached input devices. Select the number of the device for the Elo TouchSystems 2216 Accutouch Interface (this was device number two on our system).
4. Evtest will show some configuration data then pause, waiting for input.
5. Using your finger or a stylus, touch the very top left corner of the touch screen. You will see the evtest scrolling a series of data output with both ABS_X and ABS_Y lines, followed by numeric values:
Event: time 1374175747.420998, type 3 (EV_ABS), code 0 (ABS_X), value 484
Event: time 1374175747.421011, type 3 (EV_ABS), code 1 (ABS_Y), value 3364
6. Of these values, write down the lowest observed ABS_X value and the highest observed ABS_Y value.
7. Now repeat the process, but this time touch the lower right hand corner of the screen and write down the highest ABS_X value and the lowest ABS_Y.
8. Now open the 10-evdev.conf file we used in the last step and add the following to the previously created section: Option “Calibration” “minX maxX minY maxY”, substituting minX, etc., for the observed values from above. The resulting final text of this section should look like this (but of course with the values from your test):
Section "InputClass"
		Identifier "elo touchscreen catchall"
		MatchVendor "EloTouchSystems_Inc"
		MatchDevicePath "/dev/input/event*"
		Driver "evdev"
		Option "InvertY" "true"
		Option "Calibration" "449 3562 575 3412"
EndSection
9. Save the file, reboot, and now your cursor should follow your finger very closely.
All that is left to do is add the ability to right-click-to-hold, which is necessary for a fully functioning touch screen.
Enabling Hold-For Right Click
This is the easiest part of our process. In order to add right clicking, open the 10-evdev.conf file one more time and add the following lines to the same section we previously created:
- Option “EmulateThirdButton” “1” – This enables the feature.
- Option “EmulateThirdButtonTimeout” “750” – This sets the time in milliseconds you must hold your finger down to create a right-click event.
- Option “EmulateThirdButtonMoveThreshold” “30” – This sets the threshold at which you are allowed to slightly move your finger during the timeout without restarting the timeout count.
Your final section should look like this:
Section "InputClass"
		Identifier "elo touchscreen catchall"
		MatchVendor "EloTouchSystems_Inc"
		MatchDevicePath "/dev/input/event*"
		Driver "evdev"
		Option "InvertY" "true"
		Option "Calibration" "449 3562 575 3412"
		Option "EmulateThirdButton" "1"
		Option "EmulateThirdButtonTimeout" "750"
		Option "EmulateThirdButtonMoveThreshold" "30"
EndSection
Reboot, and now you should have a fully functioning industrial touch screen PC with Raspberry Pi!
Conclusion
We hope you have enjoyed this proof-of-concept project installing the Raspberry Pi into a Hope Industrial touch screen.
Keep checking our blog for more step-by-step guides to creative uses of existing technology paired with Hope Industrial touch screen monitors. We will be writing more posts like these based on customer interest in the future. Feel free to contact us with any questions or suggestions.
Visit this blog post for updated information on using Raspberry Pi to calibrate a Hope Industrial touch screen.